Notes on the Hardkernel ODROID-XU3 Single-Board Computer
UART
Connect the UART-side of the USB-UART cable to the UART port of the ODROID-XU3.
Connect the USB-side of the cable to host computer.
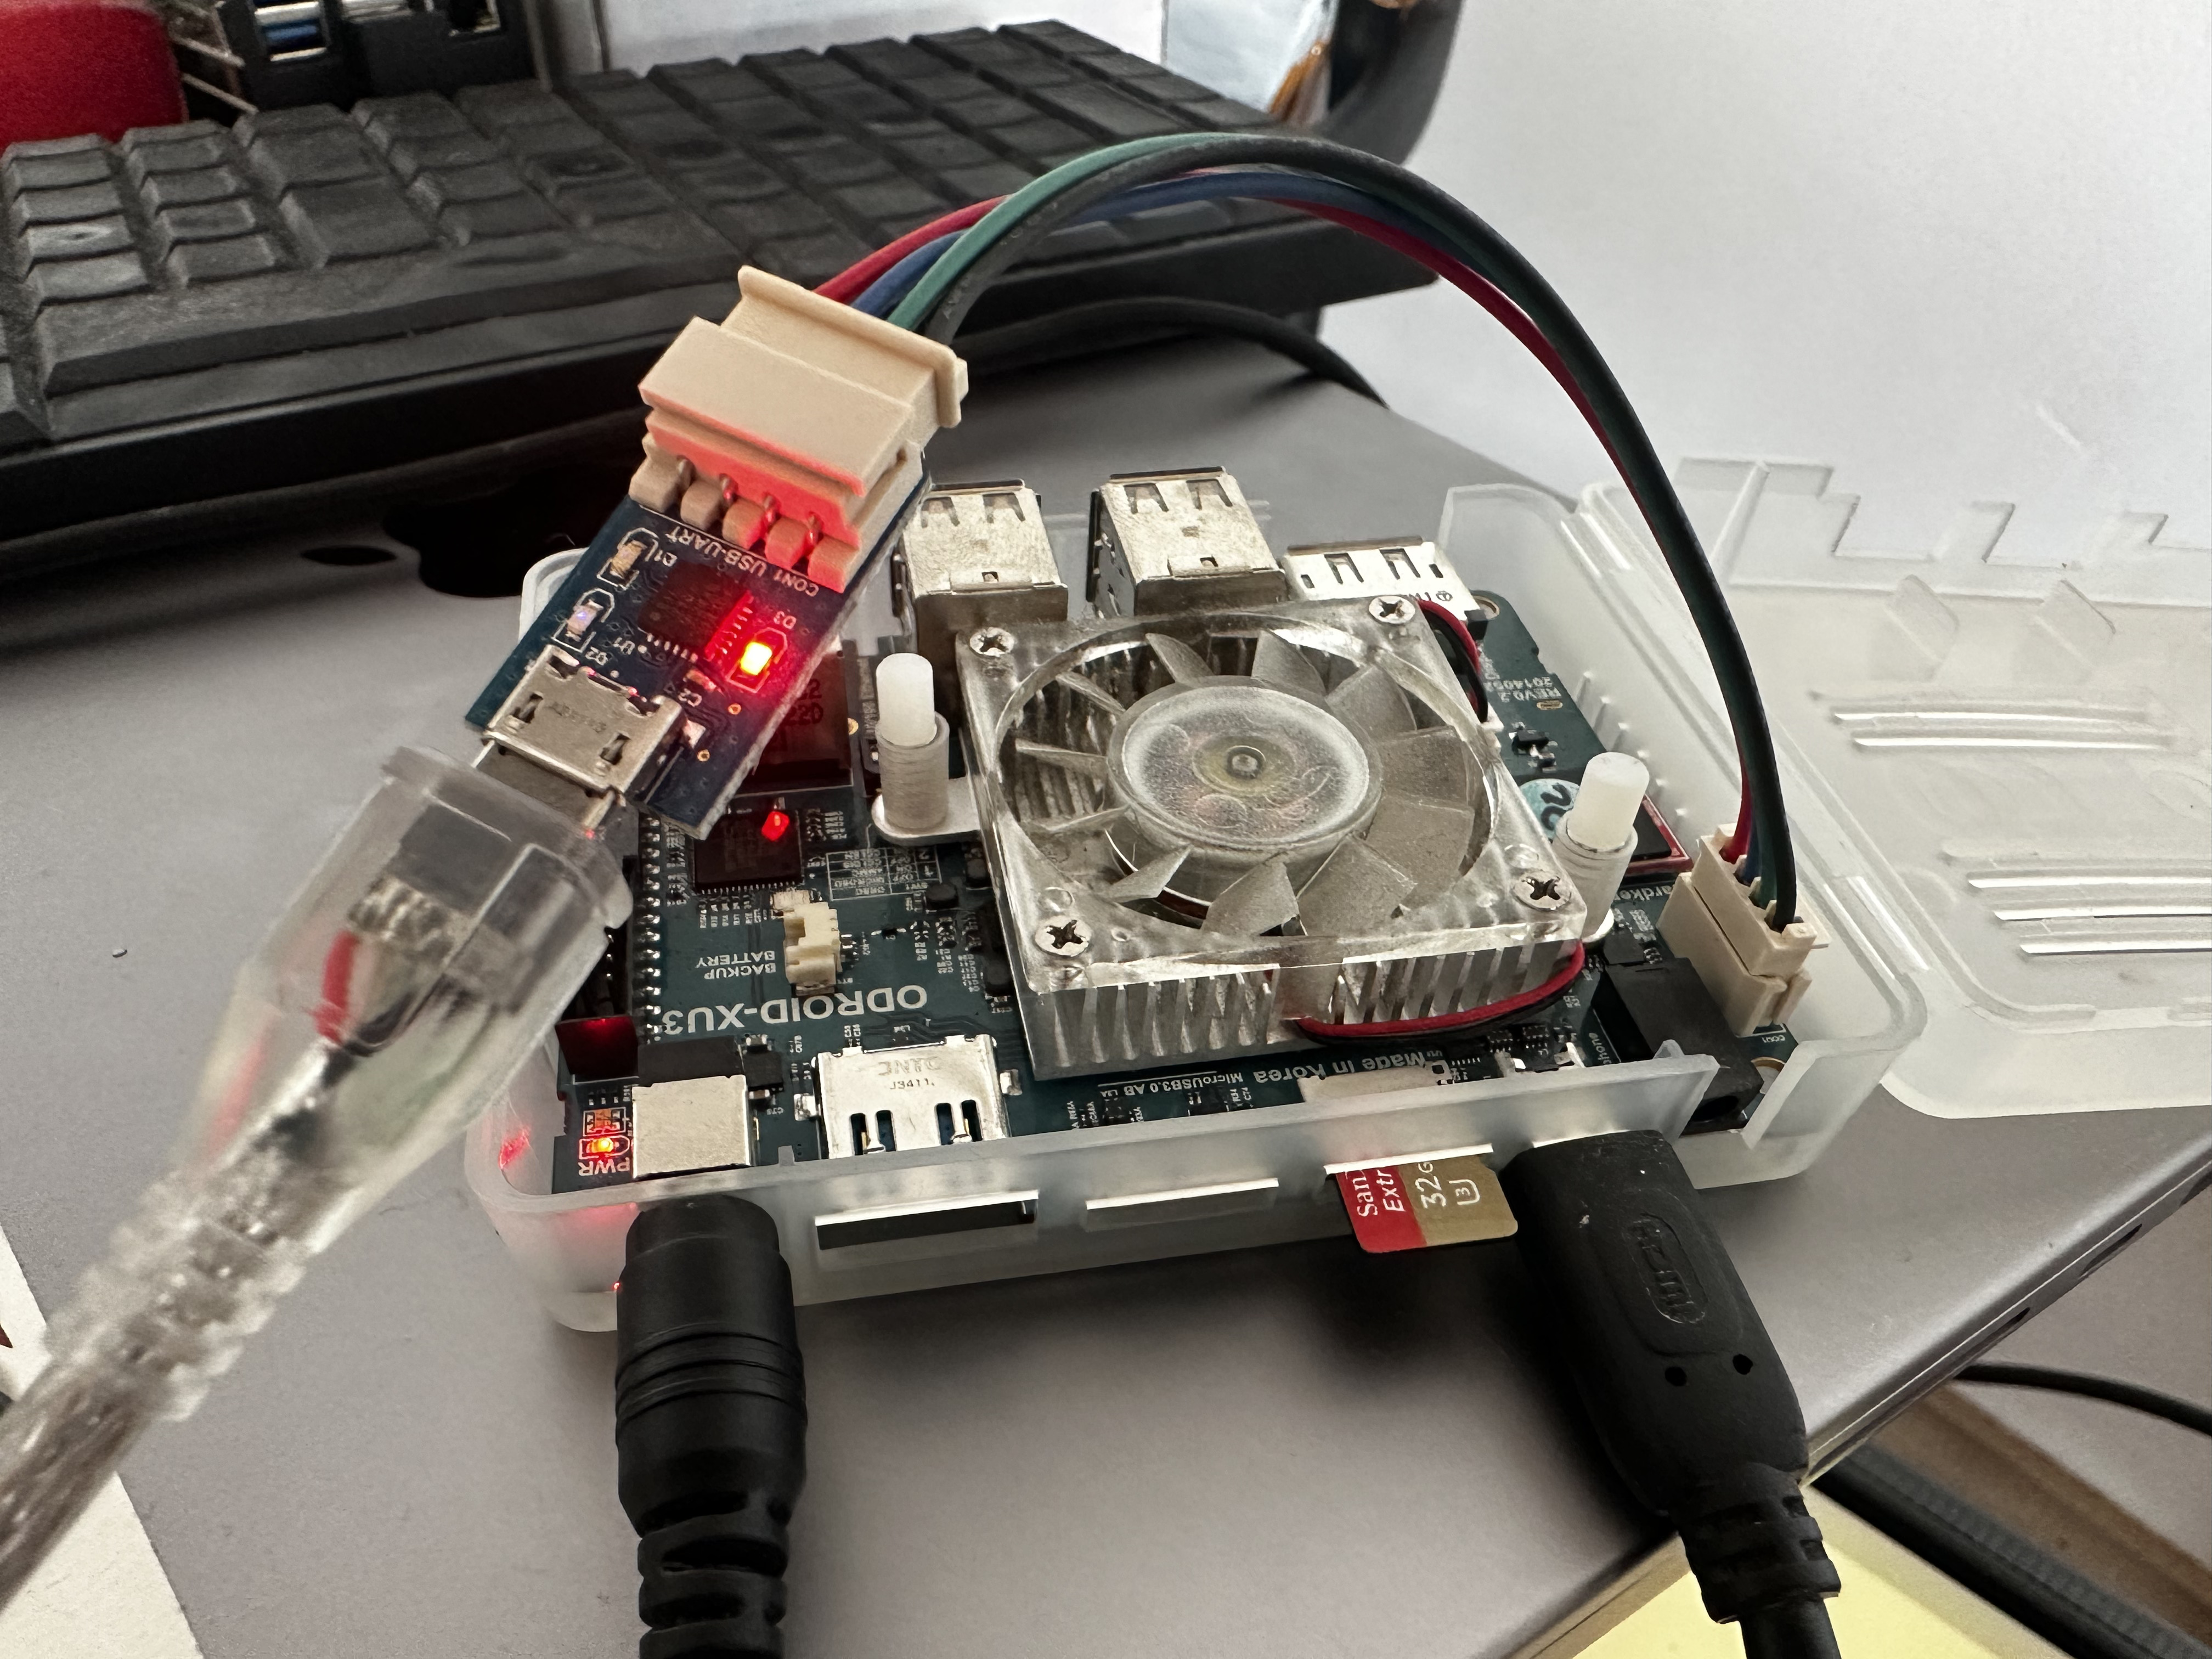 Figure 1. USB-UART cable connected.
Use the screen command to connect, with the settings given below.
screen /dev/tty.usbserial-0090D6A2 115200,cs8,-ixon,-ixoff,istrip
Path to tty device will vary. Adapt as necessary (locate it by looking in /dev/).
Power on the device and you should see text in the console.
To disconnect (kill) screen, use Ctrl-a k.
Operating System Images
Ubuntu 22.04 Image (20220522) with MATE Desktop
This is the most recent image that I have tested myself.
It seems to work as expected.
Compressed image:
% stat -f '%z %Sm %N' ubuntu-22.04-5.4-mate-odroid-xu4-20220522.img.xz
2615880620 May 23 04:08:13 2022 ubuntu-22.04-5.4-mate-odroid-xu4-20220522.img.xz
% md5 ubuntu-22.04-5.4-mate-odroid-xu4-20220522.img.xz
MD5 (ubuntu-22.04-5.4-mate-odroid-xu4-20220522.img.xz) = e257029e73fbfa8448f575a9ca440129
% ipfs add ubuntu-22.04-5.4-mate-odroid-xu4-20220522.img.xz
added QmcBxgqCKXnifSFri9h1XSWt3mQZgCZjqca96pqyigbFBg ubuntu-22.04-5.4-mate-odroid-xu4-20220522.img.xz
Uncompressed image:
% stat -f '%z %Sm %N' ubuntu-22.04-5.4-mate-odroid-xu4-20220522.img
7475298304 May 23 04:08:13 2022 ubuntu-22.04-5.4-mate-odroid-xu4-20220522.img
% md5 ubuntu-22.04-5.4-mate-odroid-xu4-20220522.img
MD5 (ubuntu-22.04-5.4-mate-odroid-xu4-20220522.img) = 17ad2b72943c0d7223fcf046db6d542d
% ipfs add ubuntu-22.04-5.4-mate-odroid-xu4-20220522.img
added QmU2Eoz6AsNDNhtNoUt3w34nfQYv1XPwSWax93h8geh4wM ubuntu-22.04-5.4-mate-odroid-xu4-20220522.img
Downloaded from odroid.in file server, via ODROID Wiki.
HDMI
HDMI port works out of the box with the above OS image, but with my Svive Pyx 34C801 computer monitor being a bit difficult
I have to connect the HDMI cable, then power on the ODROID, and then turn on the monitor. If nothing shows up on the screen, I then have to pull the power plug of the monitor and plug it back in.
I have this same issue with other things connecting to this particular
monitor as well, so it's not really related to the ODROID. But it bears to mention anyways.
Connecting to television monitor
The Sony KDL-32EX600 television in our home in Spain is not able to display anything for the XU3.
Meanwhile, that same TV works fine when connecting for example Raspberry Pi Compute Module 4.
I've tried some various settings in the /media/boot/config.ini file on the XU3 but none helped.
eMMC and SD card
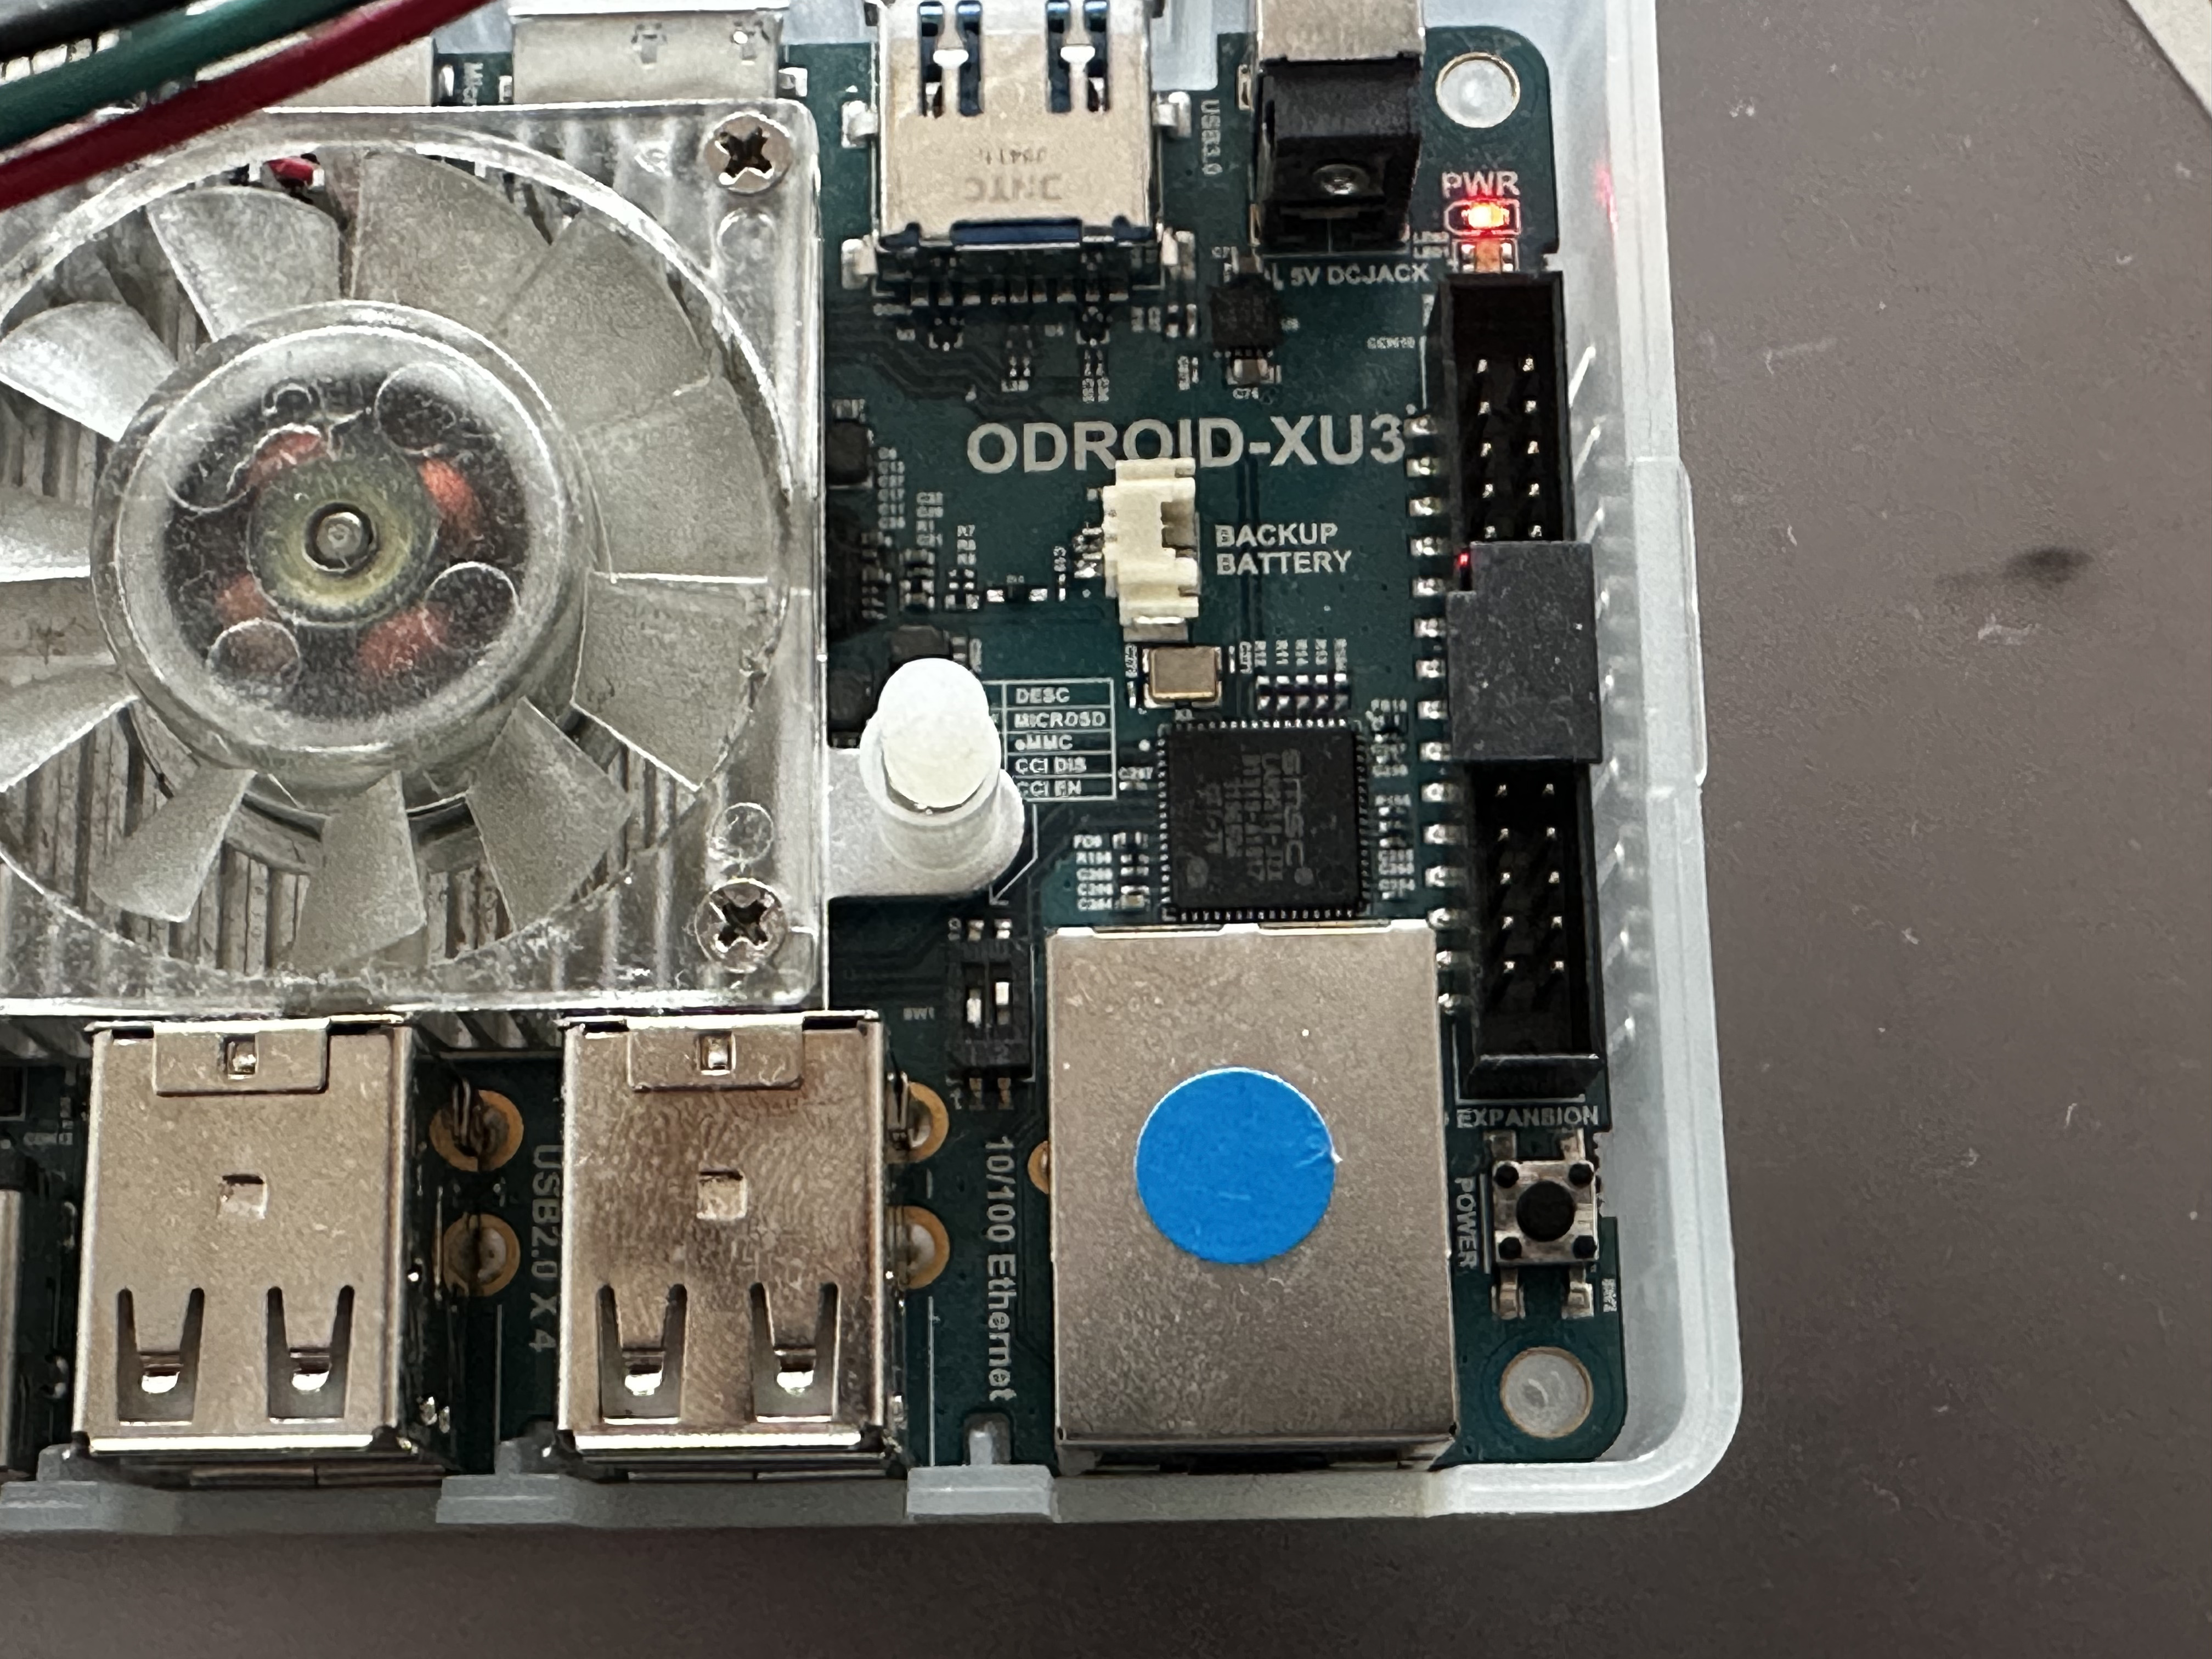 Figure 2. SW1 DIP-switch pair in position "DOWN UP", indicating boot from SD-card.
Orient the XU3 so that the ethernet port is facing you. The SD-card slot, the micro-HDMI port,
the micro-USB 3.0 AB port, the USB 3.0 port, and the power port will be facing away from you.
On the left side of the ethernet port, above the "10/100 Ethernet" text printed on the circuit board, there is a DIP-switch pair labeled "SW1".
To boot from SD card, the SW1 DIP-switch pair should be placed in position DOWN UP.
To boot from eMMC, the SW1 DIP-switch pair should be placed in position UP UP.
eMMC Bootloader Recovery
Recovery instructions based on XU3/XU4 eMMC Bootloader Recovery in ODROID DokuWiki.
If you are able to boot from SD card but not from eMMC, it could be that you need to recover the eMMC bootloader.
Connect USB-UART and connect to the UART console.
Set the switch (SW1) to boot with MicroSD on the board.
When booting starts, interrupt U-boot by pressing <Enter> twice when it says to do so.
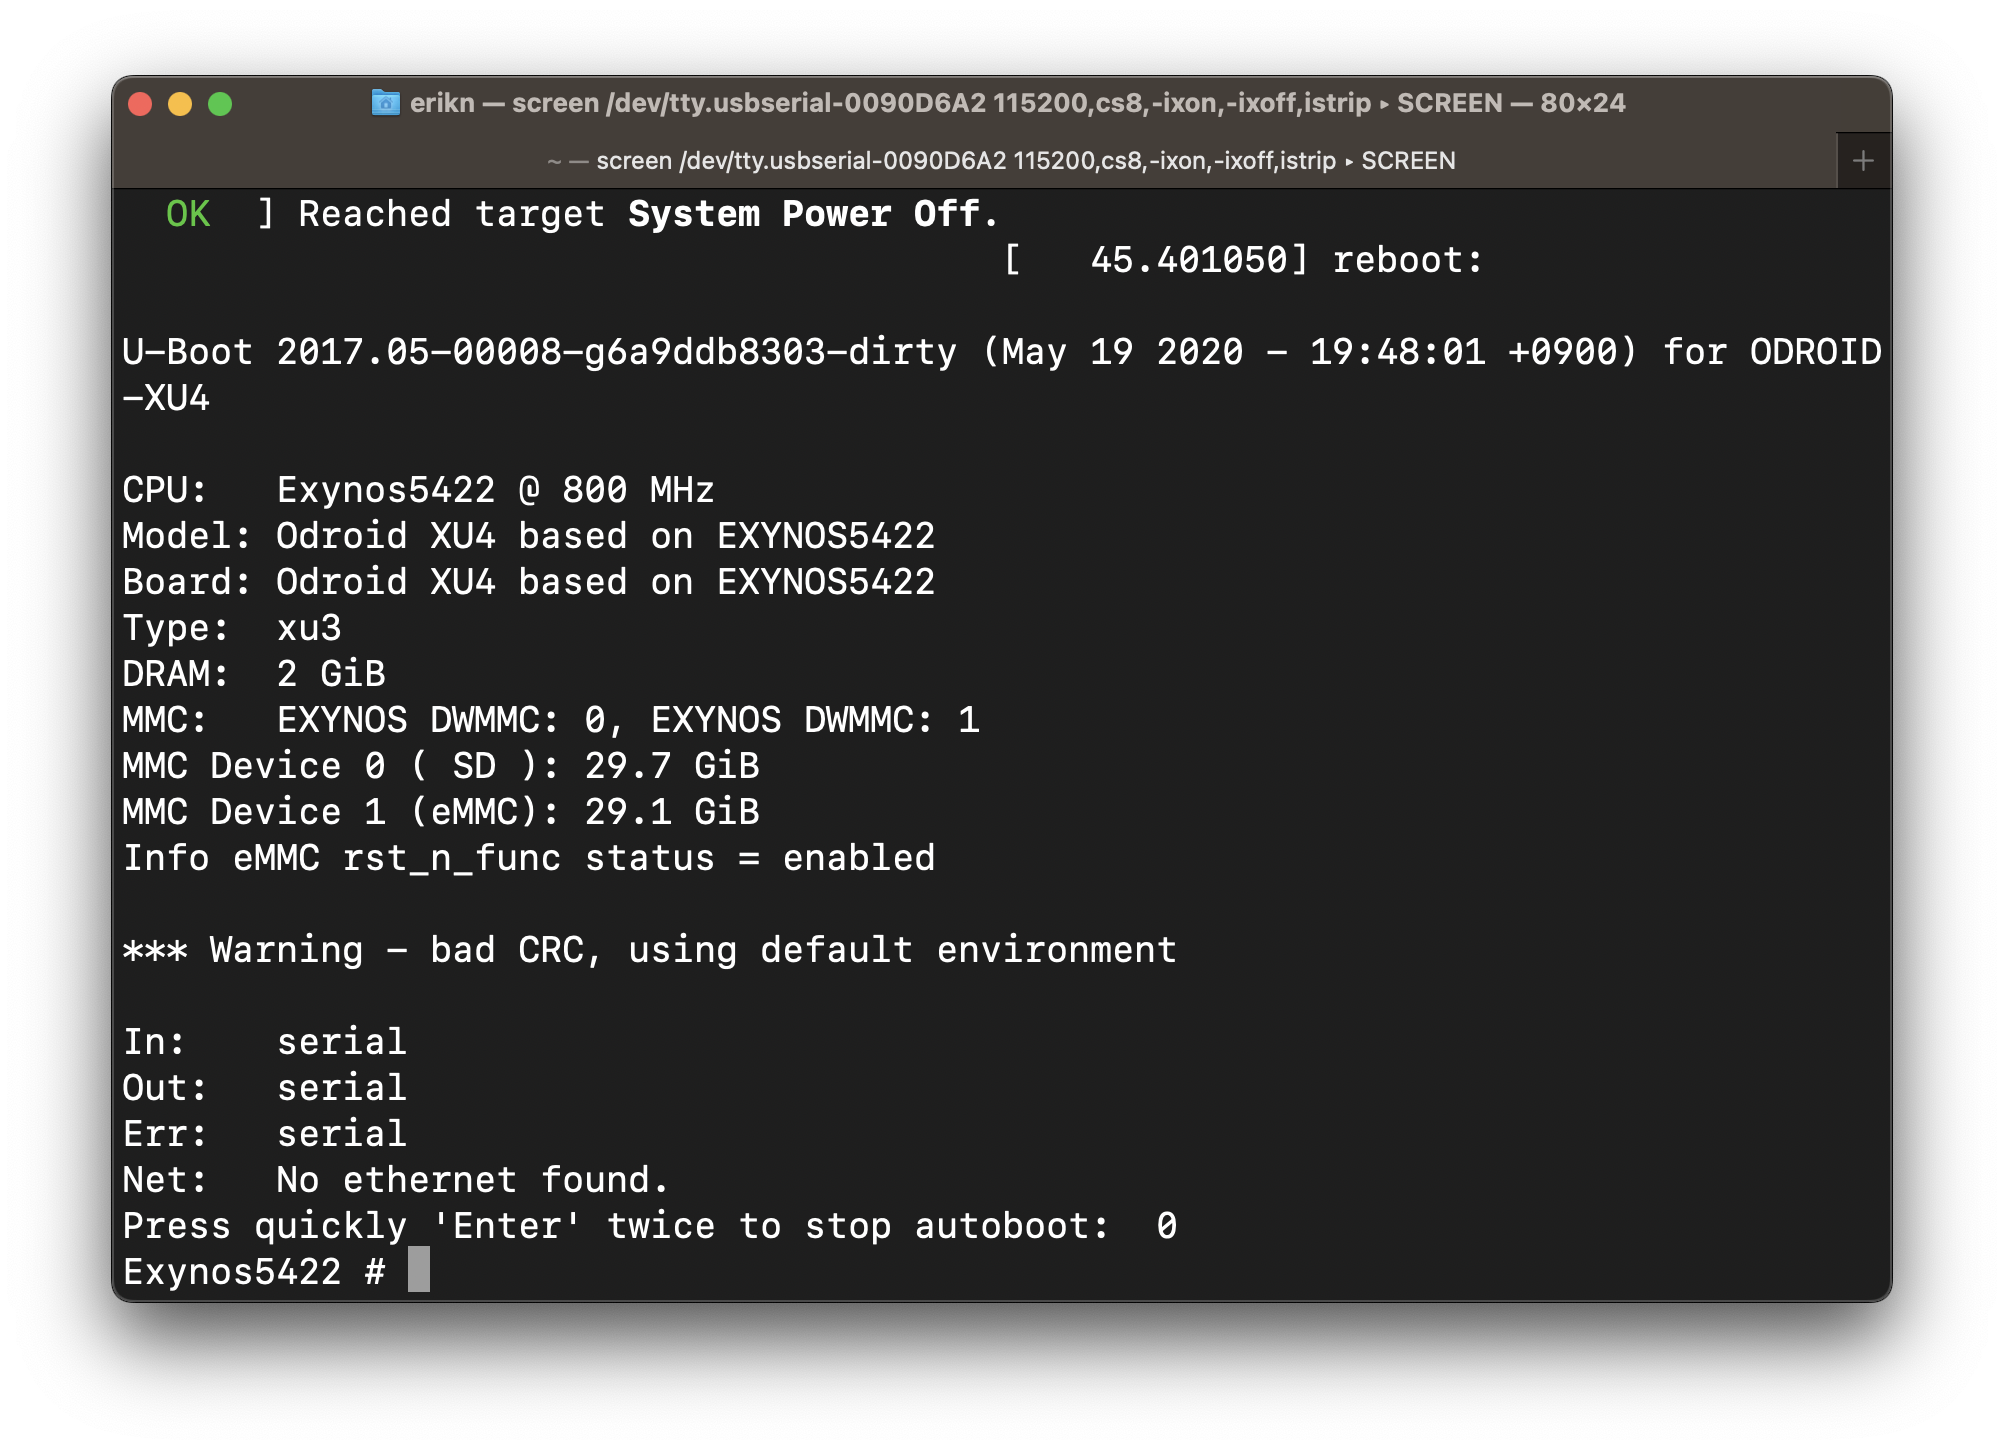 Figure 3. U-boot interrupted from connected UART console by pressing <Enter> twice.
At the U-boot prompt
Exynos5422 #
enter the following command:
run copy_uboot_sd2emmc
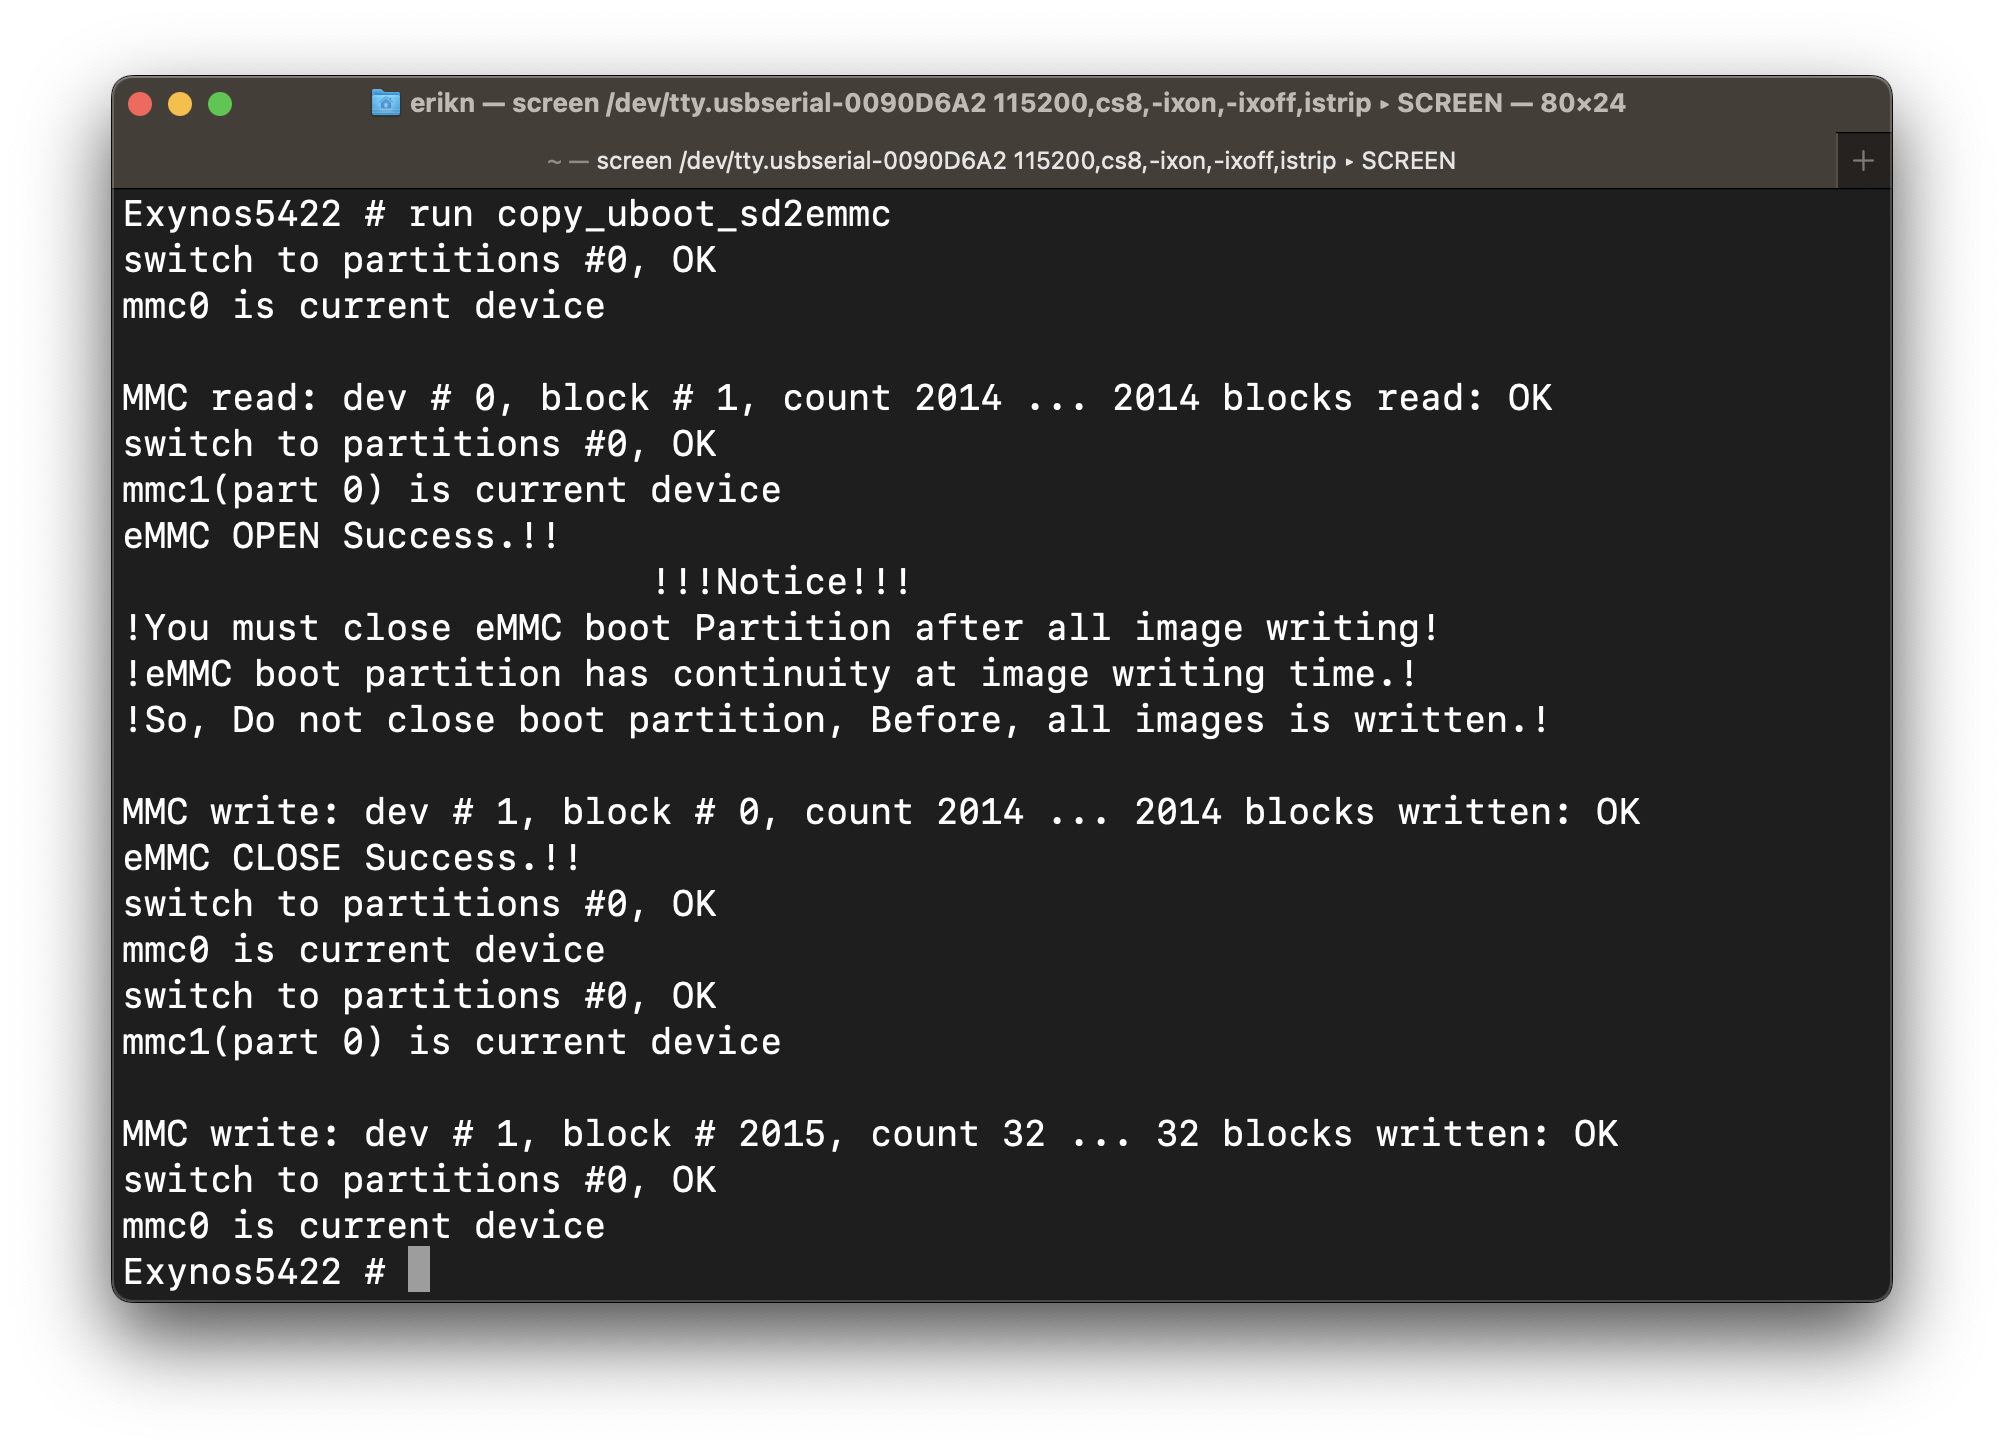 Figure 4. eMMC bootloader recovered.
Then after that finishes, still at the U-boot prompt, reset the CPU
reset
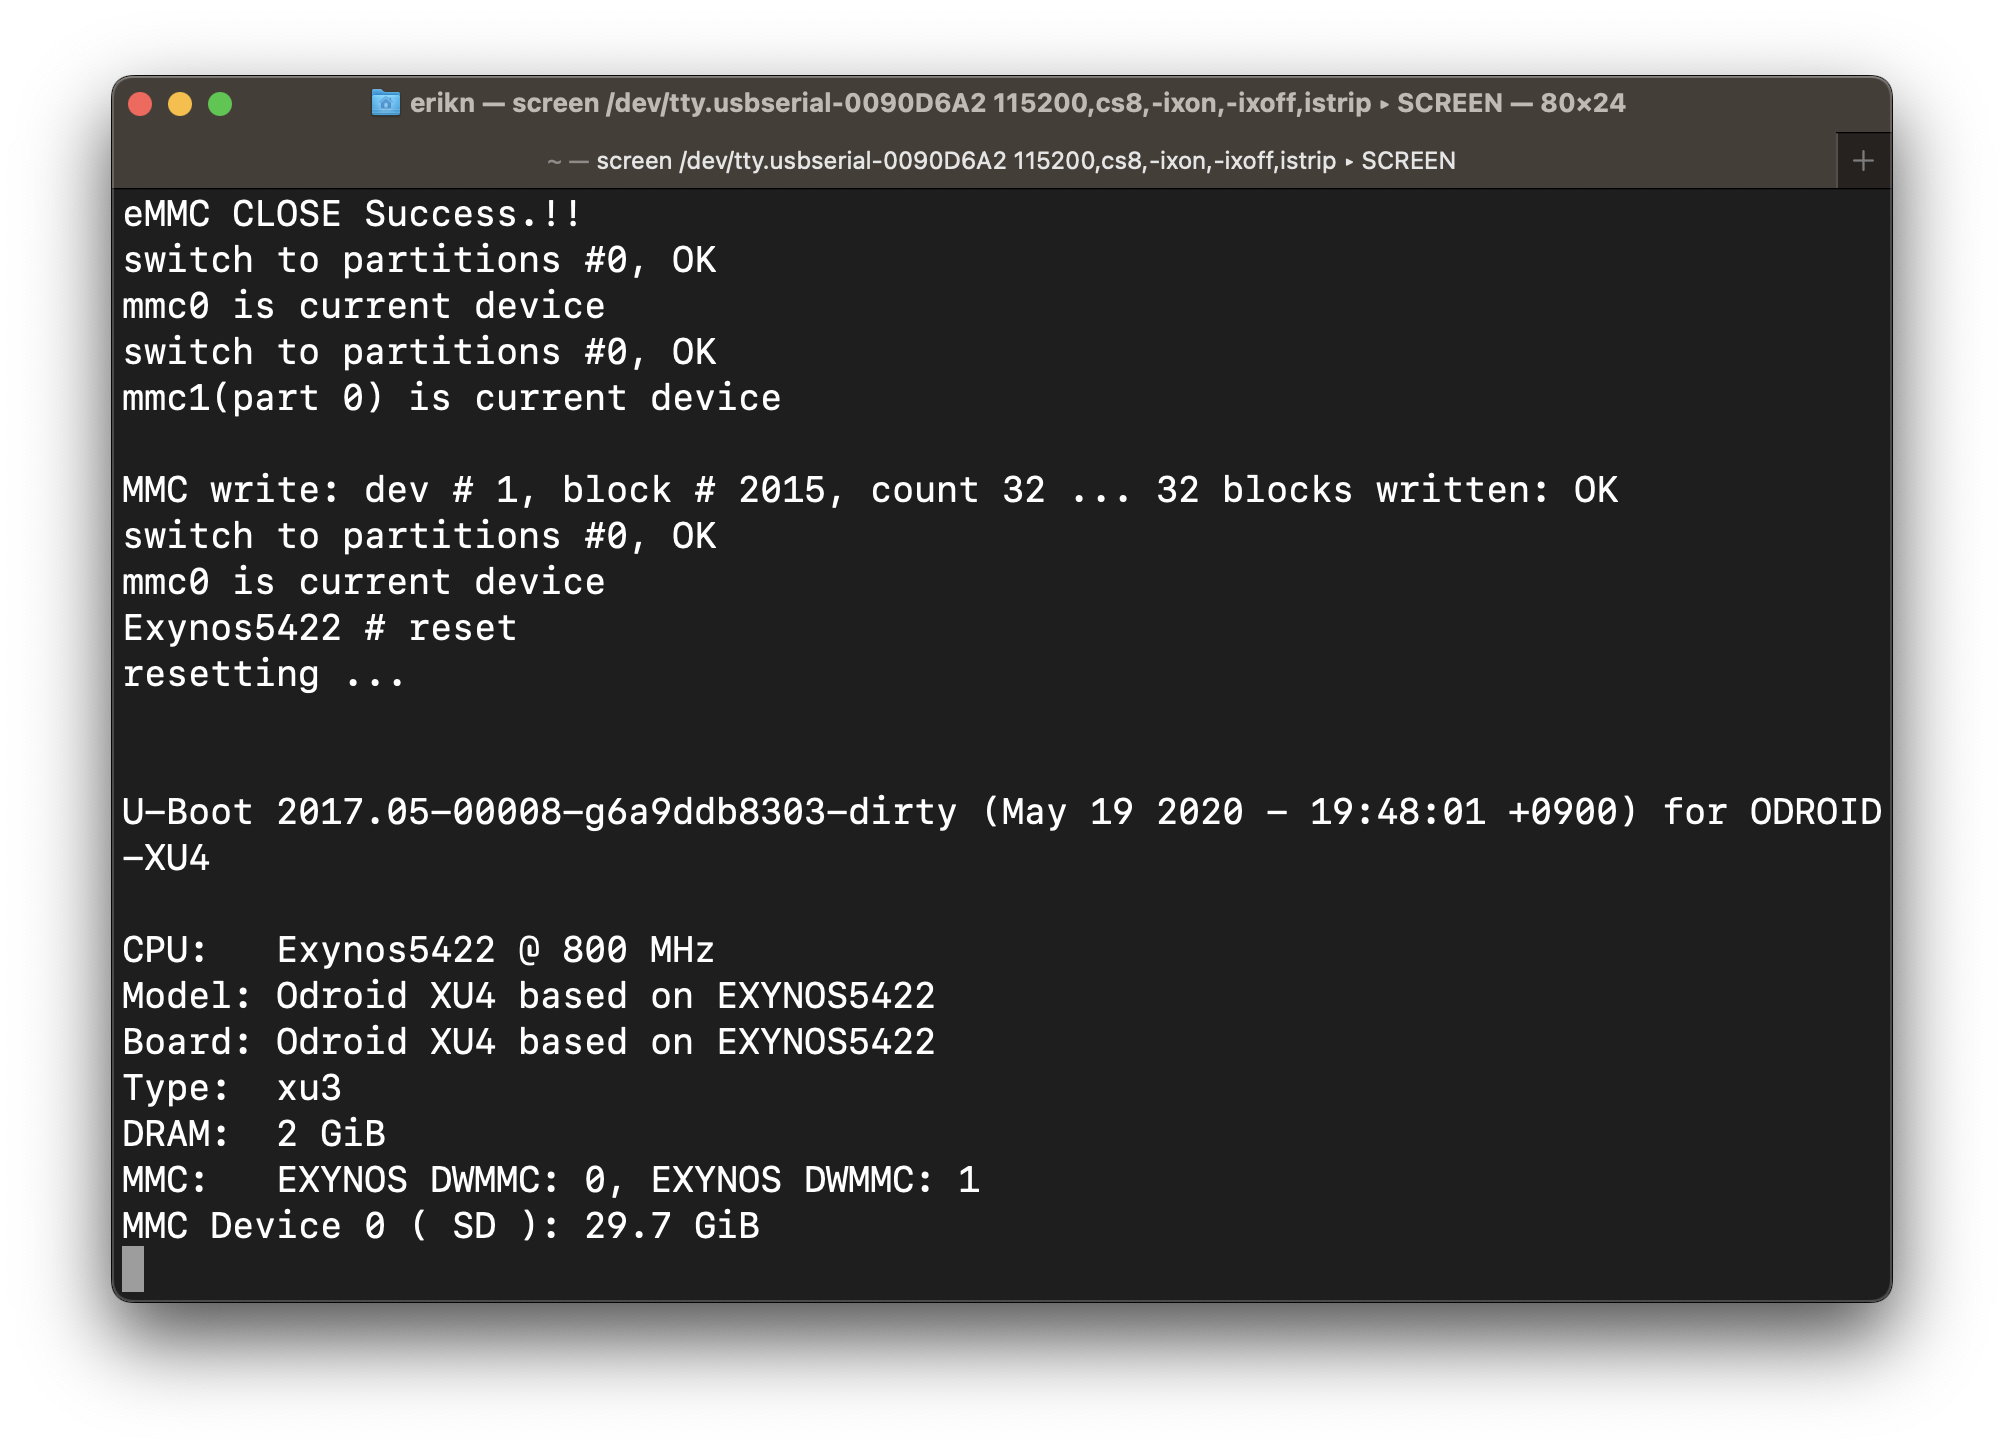 Figure 5. CPU reset performed.
When Linux finishes booting, log in at the console
and then poweroff the XU3.
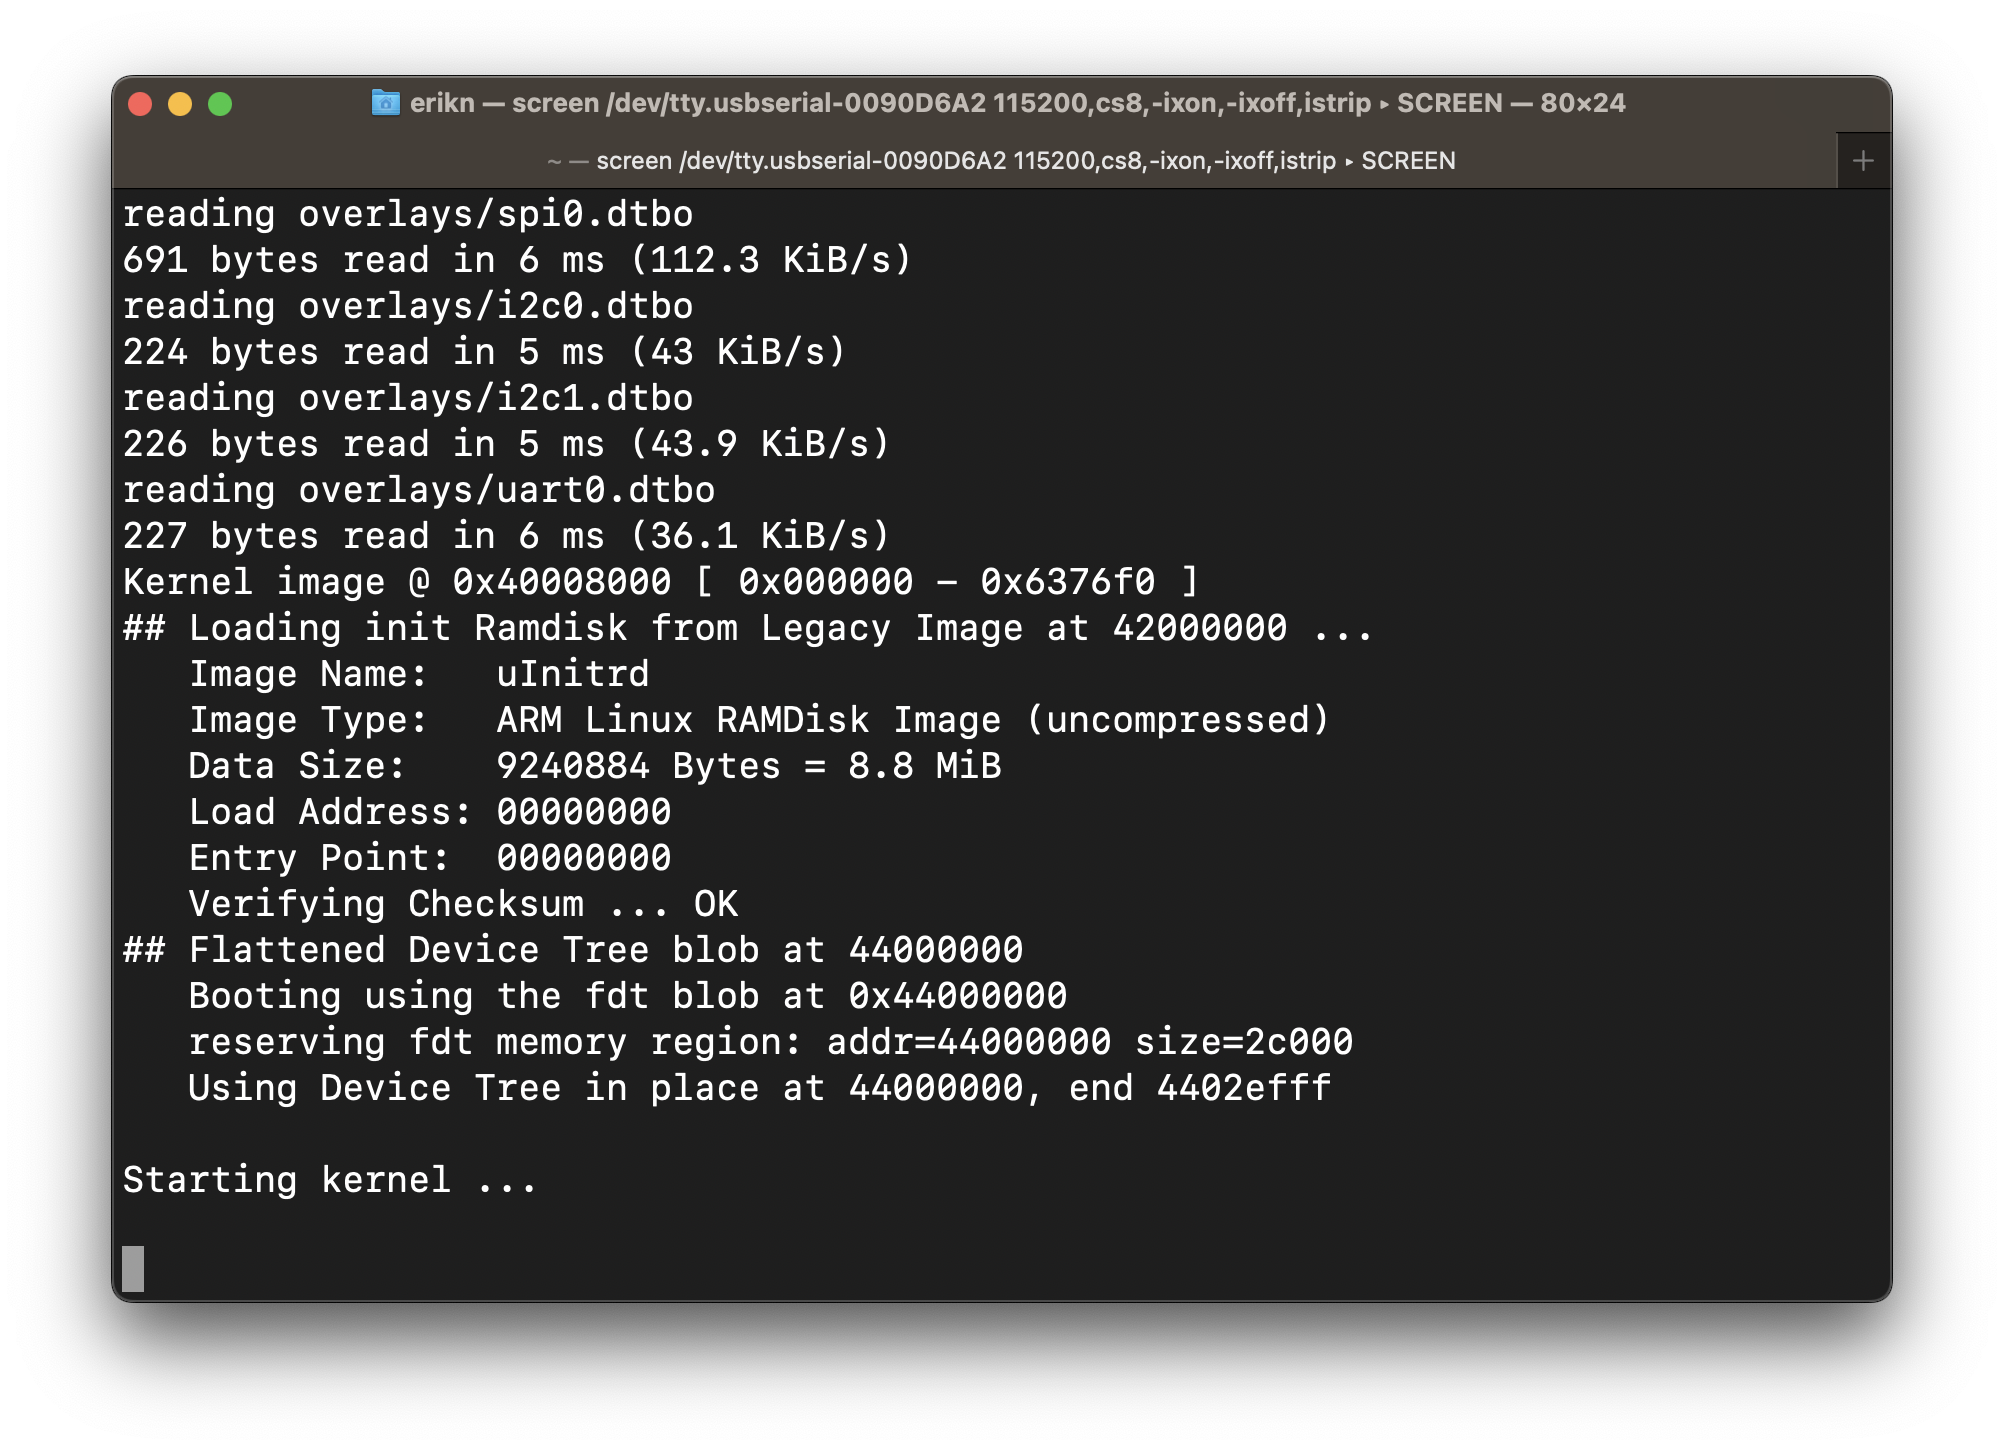 Figure 6. Kernel starting.
 Figure 7. Booting.
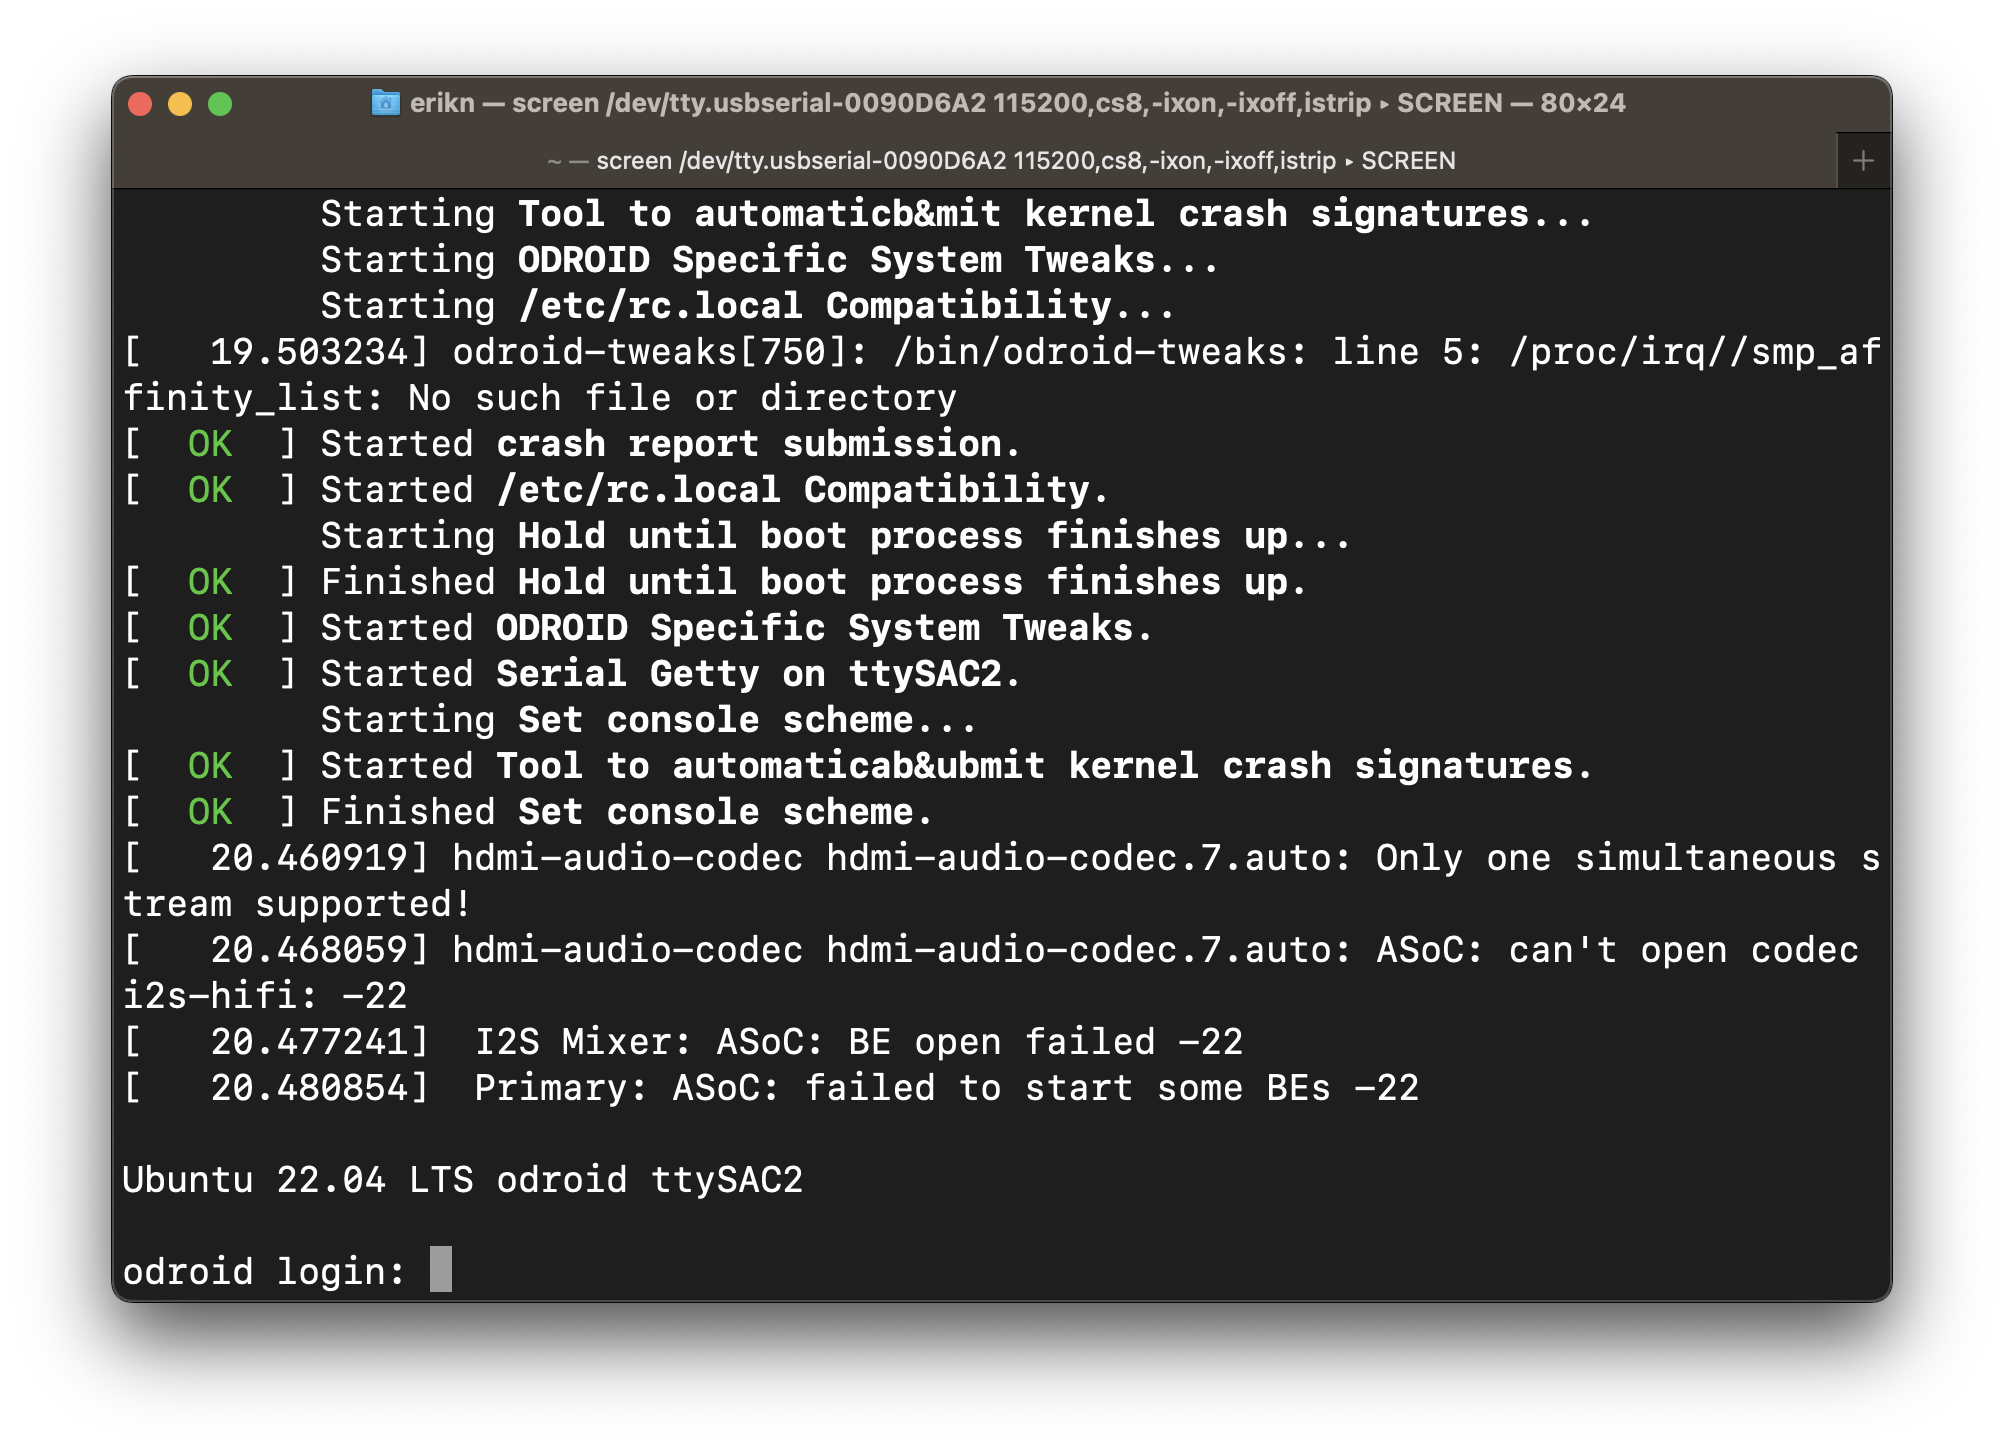 Figure 8. At Linux console login screen.
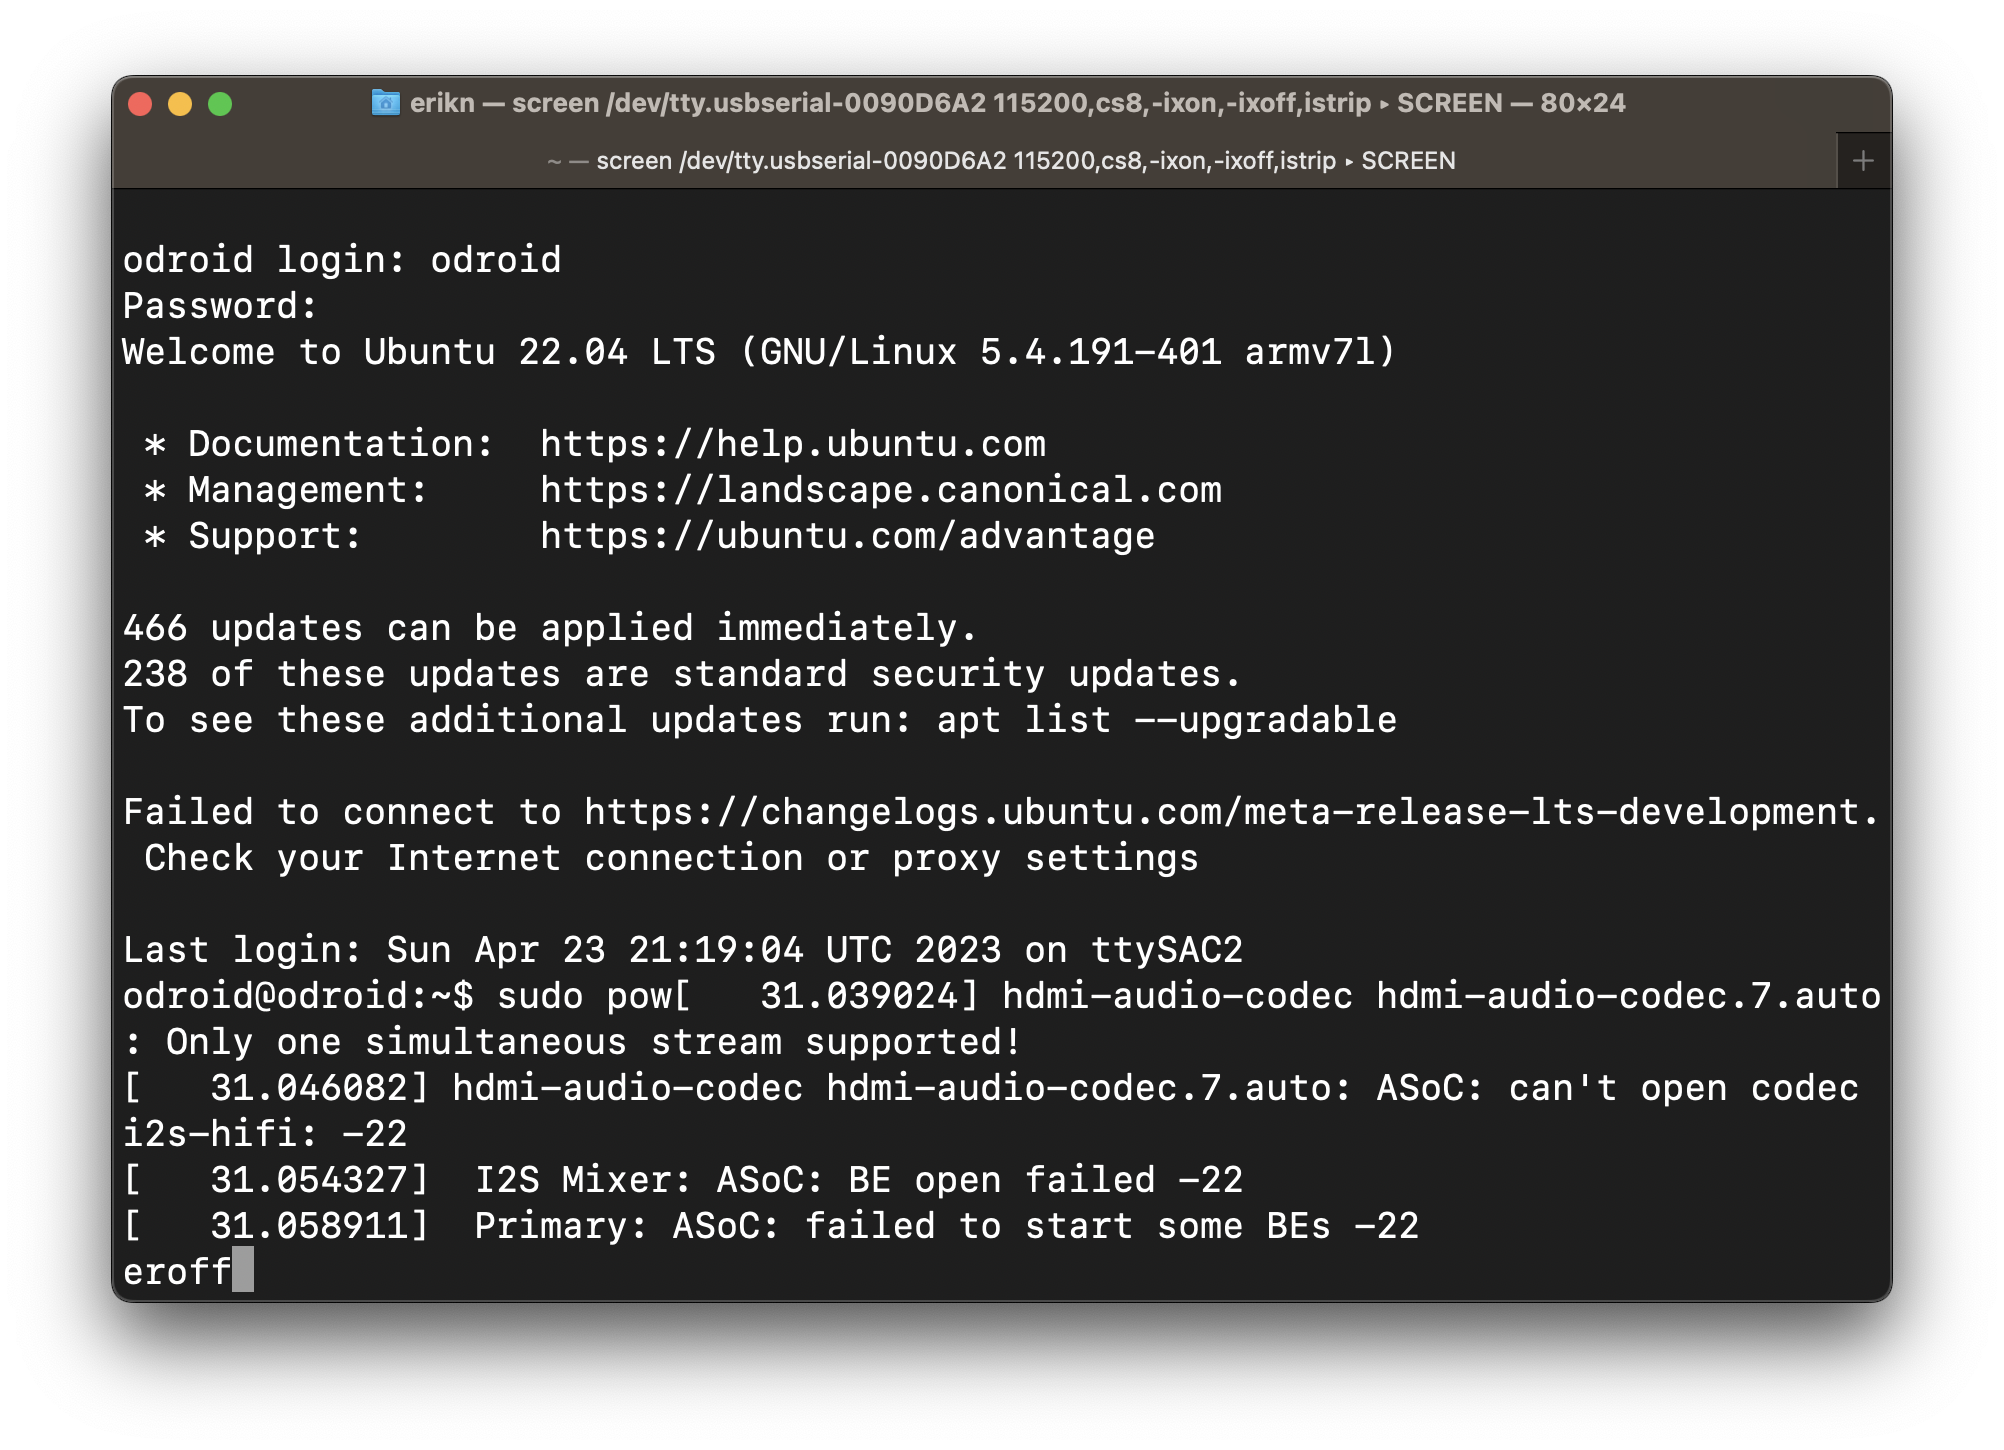 Figure 9. Powering off.
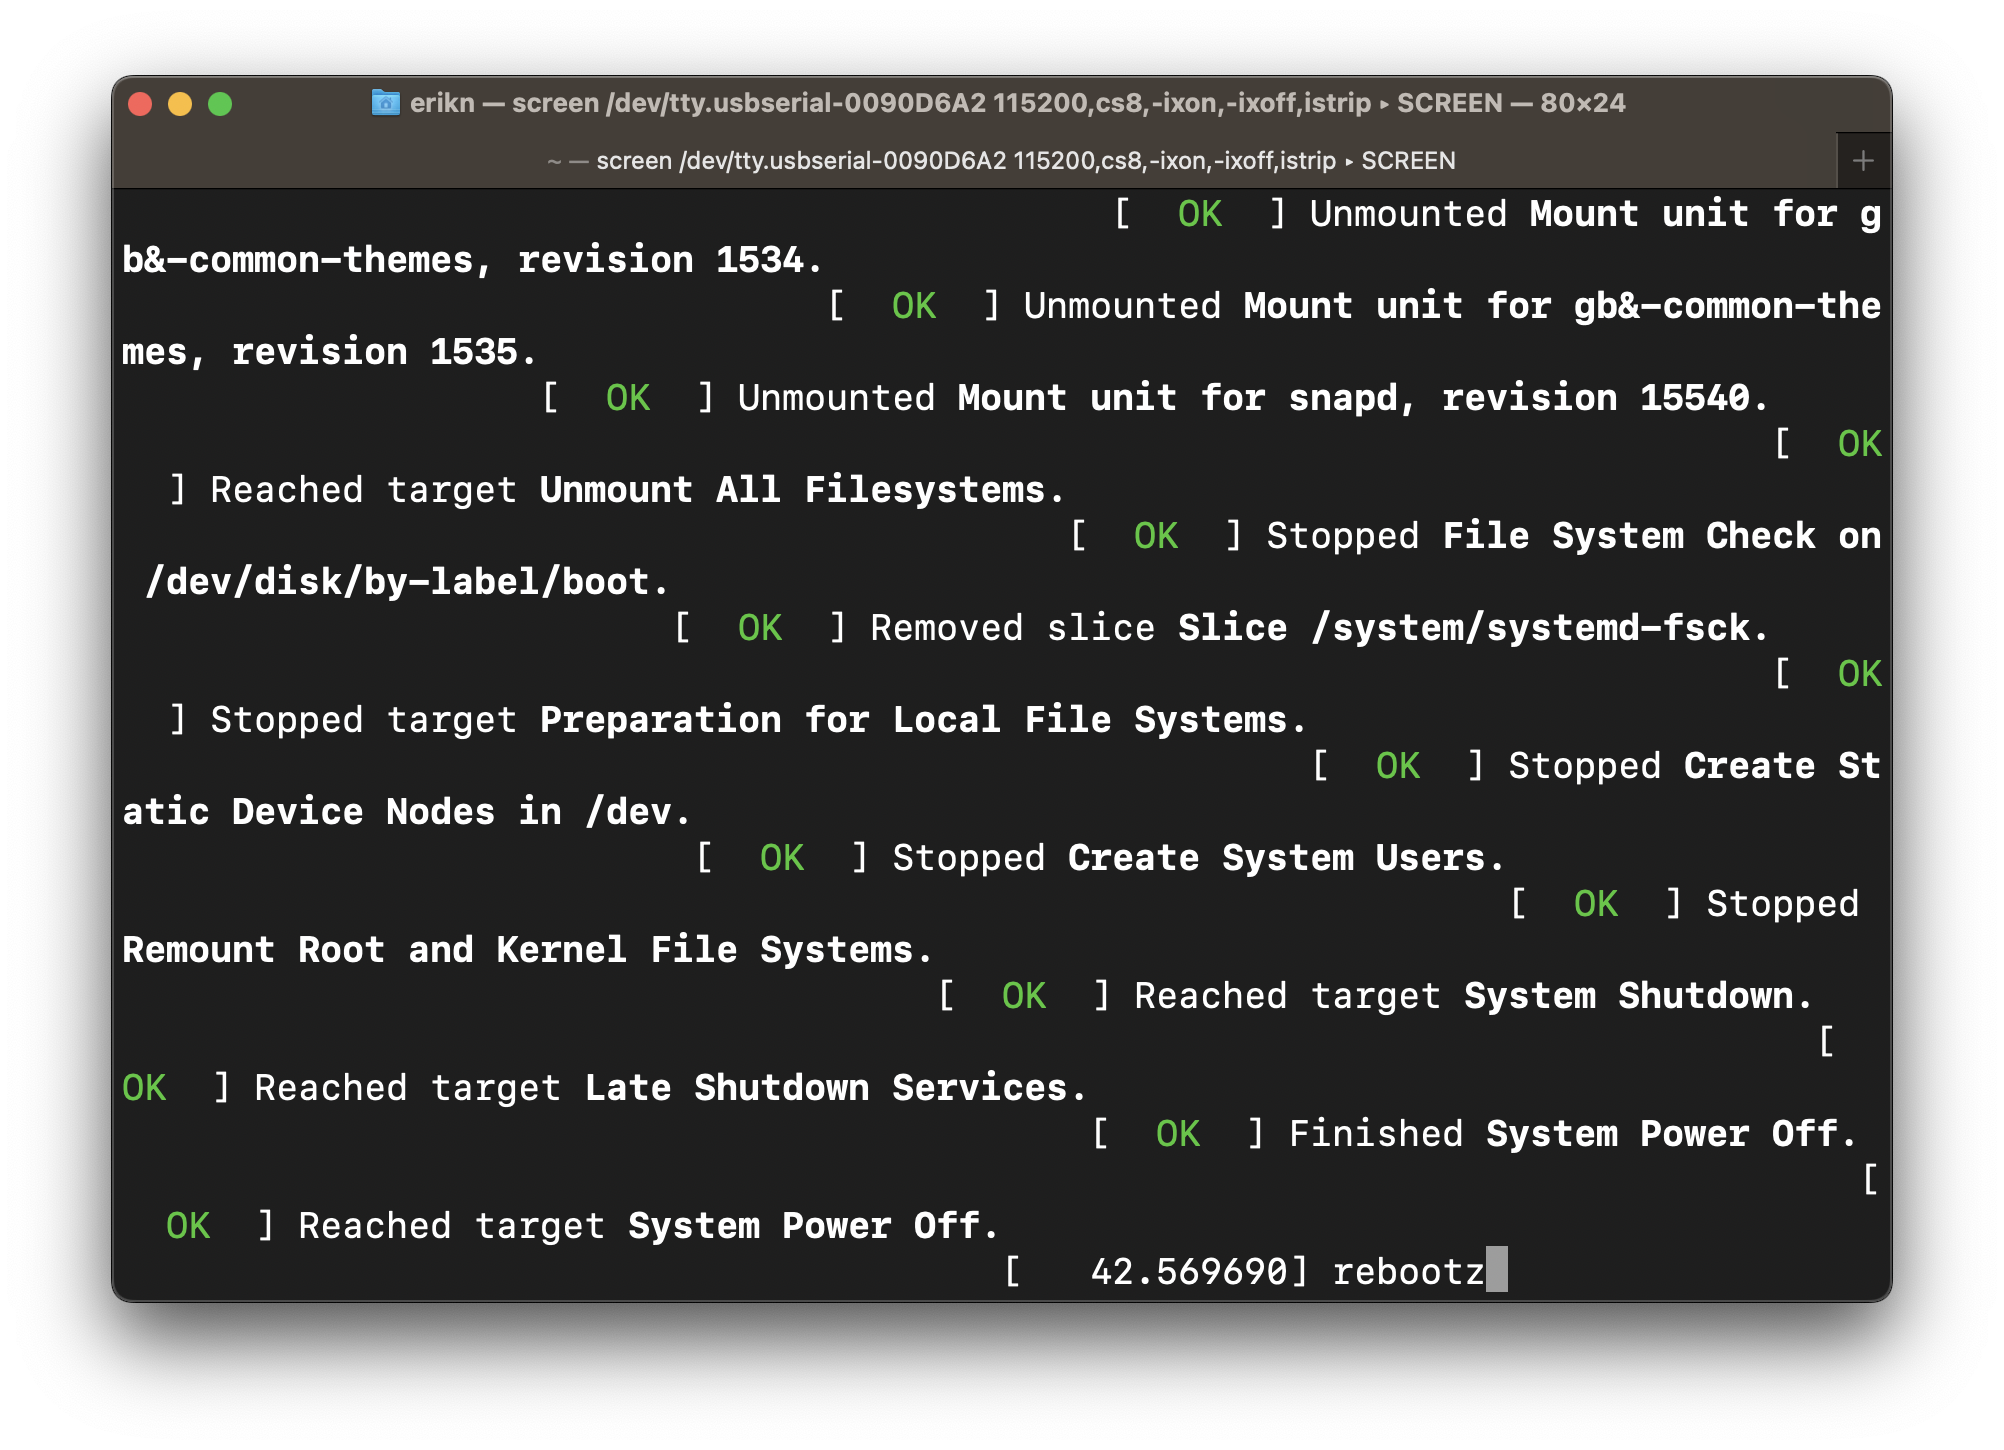 Figure 10. Powered off.
Set the switch (SW1) to boot with eMMC on the board.
Remove the SD-card from the SD-card slot and then power on the XU3.